524
A Basic Guide to Video Editing
Today anyone can create an engaging, professional-quality video, thanks to the video-editing software available on most personal computers. Below are the basic steps needed to create, edit, and publish a quality video. To get started, you’ll need a video-recording device (camcorder, smart phone, tablet, and so on) and a computer with video-editing software.
▶ Step 1: Filming
Before you begin filming, plan and research your production using a planning sheet (see page 361). If you have a tripod available, use it. It will greatly improve the quality and focus of your shot. Then begin filming. Here are some tips:
- Film different types of shots—wide shots, medium shots, and close-ups—as well as filming from different angles.
- Shoot different versions of the same shot. You can pick the best one later.
- Use framing techniques. Look for horizontal and vertical lines in the frame. The horizontal lines should be level, while the vertical lines should be straight up and down.
▶ Step 2: Capturing your video on your computer
After you are done filming, move your footage from your camera onto your computer. To do so, you will need a USB cable or other connecting technology. Refer to help guides on the Web for assistance.
▶ Step 3: Selecting the right shots
Once your footage is on your computer, open your video-editing program and select specific shots to include in your video. Use the program to cut and edit your shots to your desired length. For example, you may wish to include only the best 8 seconds of a 45-second clip.
▶ Step 4: Arranging your shots
After you have some shots in mind, drag them onto the timeline feature of your editing software and arrange them in your desired sequence. The timeline is where you will spend most of your time polishing your video. You can add, delete, and edit video footage as well as audio within your timeline.
525
▶ Step 5: Adding transitions, background music, or narration
At this point you should be ready to smooth out the transition between shots within your timeline. There are a number of common transitional effects to choose from.
- A cut switches instantly from one shot to another with no special effect.
- A fade is a gradual transition from one shot to a solid color or blank screen (white or black). A shot may fade in or fade out.
- A dissolve is a gradual transition from one shot to the next, with the two shots overlapping for the duration of the effect.
- A wipe occurs when a new shot physically moves onto the frame and pushes out the old one.
- B-roll is secondary footage that can be used to intercut main shots. It is often shown during an audio voiceover (narration) or to introduce a new scene.
▶ Step 6: Background Music
Just as with your video footage, you can import music into your video-editing software and then drop it into the timeline, editing and arranging it as you wish.
▶ Step 7: Polishing your video
Once you are satisfied with all the elements of your video, preview it, making sure all the elements work together to create a pleasing whole.
▶ Step 8: Publishing your video
Present your video for others to see by uploading it online or burning it onto a DVD.
Glossary of Video-Making Terms
- Close-up (CU): A shot taken from a close distance, focusing on the subject
- Depth of field: Describes the depth of the shot, how the foreground, middle-ground, and background interact spatially
- Establishing shot: A wide shot that establishes the surroundings in which the video will occur
- Framing: The manner in which the subject of the shot is shown in relation to the surroundings
- Long shot (LS): A shot from far away, making the subject appear small in relation to the surroundings
- Medium shot (MS): A conventional shot, somewhere in between a close-up and long shot
- Pan: A panoramic shot in which the frame moves horizontally while the camera pivots from a fixed position, showing a wide scene
- Point-of-view shot (POV): A shot made from the perspective of one of the characters, as if the viewer is looking through the character’s eyes
- Shot: A specific subject filmed from a specific angle
526
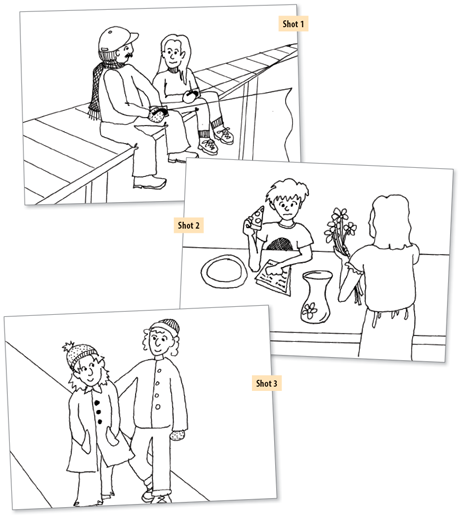
Storyboarding
After writing a video script, you can storyboard it. A storyboard is a series of pictures that previews a video shot by shot. It helps the director of the video communicate to others what he or she is thinking for each shot in the video. Here is the beginning of a storyboard for the PSA on page 521.